This step by step tutorial will guide you on how to setup and install your new Composite Decking to make your neighbors jealous!
Composite decking is a simple yet affordable addition to spruce up any garden.
Checklist
So like most things in life you will want to make sure you have every tool at your disposal to make life easier for yourself, Below is a checklist of everything needed to make this project as smooth as possible

Measuring Tape – Simplest way to gather the correct exact measurements without fail.

Spirit Level – Used to measure levelness within flooring to ensure straight paneling and decking

Carpenters Pencil – Used to mark specific details within your decking for the most precise cut.

Saw – A saw is used to make precise cuts to your decking if needed.

Hammer – A hammer is used to either hammer a pin in place or to hammer your decking into place.

Shovel – Used to make any leveling adjustments to your base ground typically being soil.

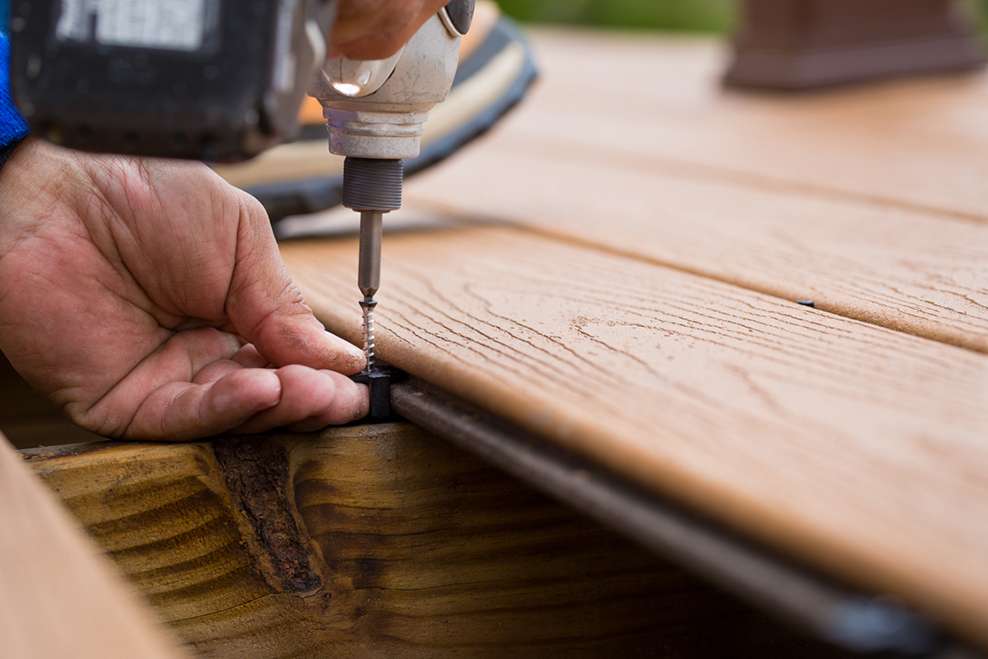
Drill – Best way to drill home your screws is to by well a drill!

Now that you have your tools locked and loaded you are ready to start installing your decking, First thing to note is Safety Precautions.
Safety First!
Now that you have your tools locked and loaded you are ready to start installing your decking, First thing to note is Safety Precautions.
As with most building work, it is crucial to work safely and take every precaution necessary including wearing Protective Clothing

Safety Goggles – Prevent any off cuts from injuring your eyes.

Gloves – Prevents cracking of hands and splintering.

Face Mask – Whilst working with drills and saws, a face mask is essential to avoid breathing in fumes that could be harmful to ingest.
Step One – Framework Preparation
Now that you are kitted up and ready for action you can proceed with step one!
- Measure and ensure that the ground is solid and level
- Build any necessary support structure for the decking e.g Joists , one thing to consider is joist thickness for added security

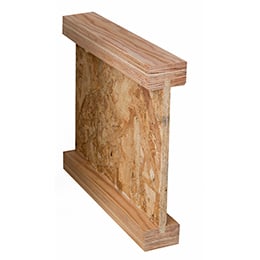
Joists are available in our store
Step Two – Laying Boards
- Start by positioning your starter clips provided at each end of your frame that you have built at regular intervals in between, you will be pushing your board into these clips so ensure that where they sit is right up against the edge of your frame and screw the starter clips into your frame.
- Now, push the first decking board so that the starter clips fit into its side groove and ensure that the board us pushed tightly secured.
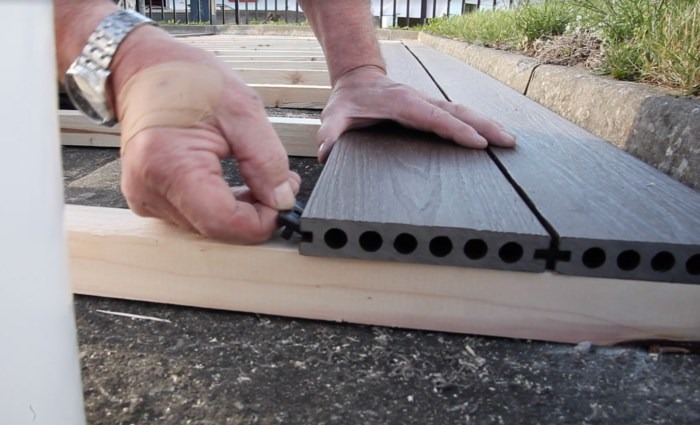
- Where the first board meets each of your frame joists push the toothed side of the special clip into the side groove.
- Screw each of these special clips into both the first board and the frame’s joists, through the pre-drilled holes. Make sure the screw holes are in line with the joist centres and that you use one fastener per board at butt joints, as well as at board ends and each joist.

Note that starter clips are provided with purchases of composite decking.
Step Three – Laying The Remaining Boards
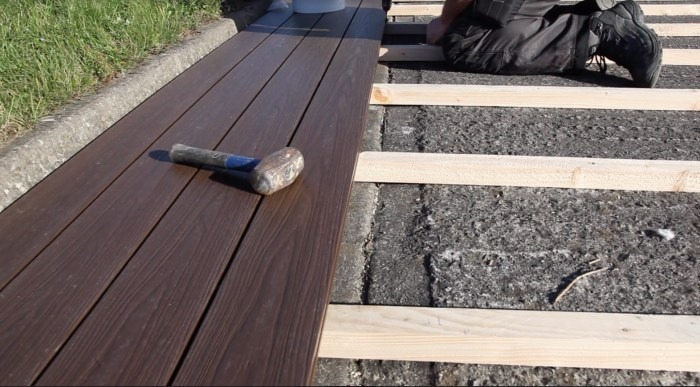
- To lay each additional board, simply its exposed side grooves against the special clips of the previous board, applying light force to ensure that it connects securely, then repeat – placing and screwing special clips into the other edge of the board, and then sliding the next board into position, and so on, until you’re left with just the final two boards of your decking to install.

Exposed side groove on a panel of Composite Decking.
Step Four – Installing The Final Two Boards
- Knowing the width of the final two boards (including the gap between them), mark on the final joist where the edge of the last board will lie.
- Now, as you did when laying the first board, use your markings to screw your hidden starter clips at each end of your frame, and at the top of the frame’s joists at regular intervals in between.
- Push the final board up against these hidden starter clips, clicking it into place.
- Further secure the final board to the frame by screwing special clips into each joist and into the side groove of the final board (on the side facing the rest of your previously laid decking)
- Finally, slide your last special clips along through the gap on the other side of your final board, between the 2nd and 3rd last boards, and when you have positioned them in the centre of each joint, screw these into place.
Conclusion
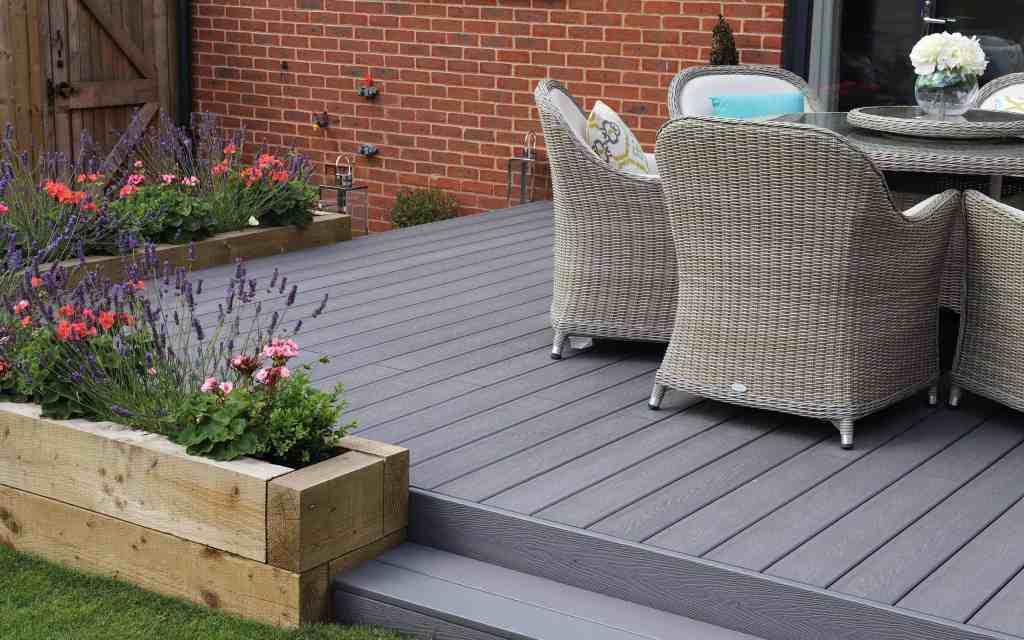
You have successfully laid down your composite decking and know your garden looks divine (give yourself a big pat on the back)
There is no need to seal or paint composite decking and it is designed to last up to 25 years, with no need to carry out the expensive and laborious annual maintenance you would need with natural wood decking.
Thank you so much for using EEC Hardwares blog to guide you through this task, all products mentioned in this blog are available on our website .
